
What Is Pad Printing for Stainless Steel Cutlery?
Struggling to find a way to brand your stainless steel cutlery with a crisp, colorful logo? Many traditional printing methods fail on the curved and irregular surfaces of flatware, leading to distorted designs that undermine your brand's quality. This is where the unique capabilities of pad printing for stainless steel cutlery provide a precise and versatile solution, ensuring your logo looks perfect on every piece.
Pad printing is an indirect offset printing process used to transfer a two-dimensional image, such as a logo or design, onto a three-dimensional object. For cutlery, this involves a flexible silicone pad that picks up ink from an etched plate and transfers it cleanly onto the curved or uneven surfaces of fork, spoon, and knife handles.
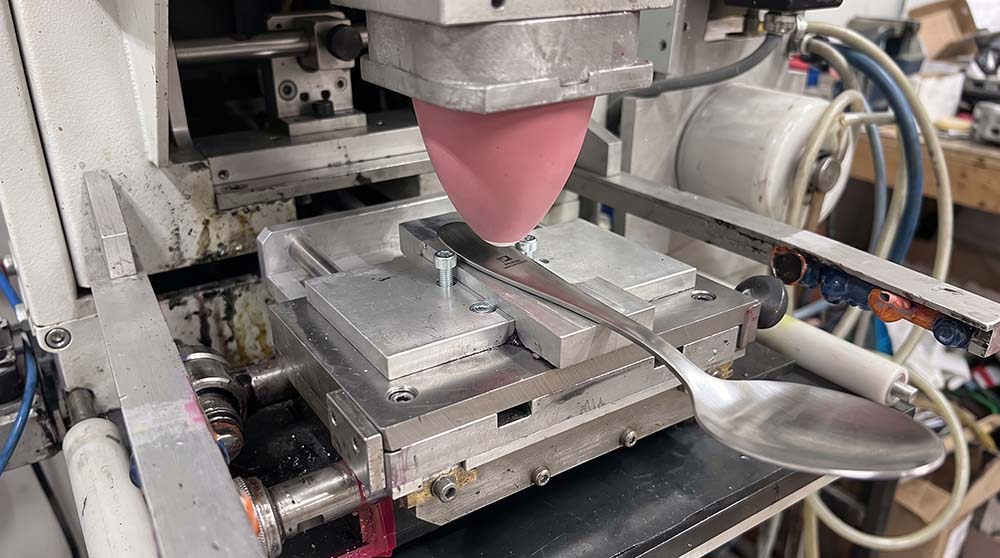
This unique transfer method is what makes pad printing so effective for flatware. Now that we understand the basic concept, let's explore the process in detail and see why it's such a valuable tool for creating branded, custom cutlery for your business.
How Does the Pad Printing Process for Stainless Steel Cutlery Work?
Are you wondering how a flat design gets perfectly applied to a curved handle? The magic of pad printing lies in its multi-step process, which is designed for precision and repeatability, especially in large-scale production.
The process of pad printing for stainless steel cutlery is more than just stamping an image. It's a carefully controlled manufacturing sequence that ensures every single piece meets the approved standard. From digital file to finished product, each step is critical.
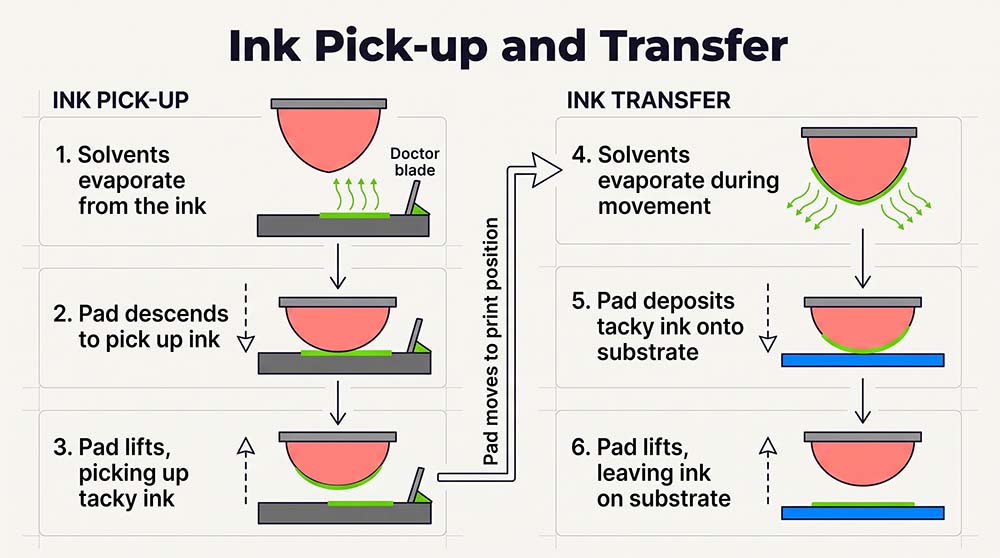
Let's dive deeper into the key stages we follow here at XR Cutlery to bring a custom logo to life on a set of flatware.
Step 1: Artwork and Plate Preparation
Everything starts with your design. For a successful project, we require a high-quality vector file of your logo or artwork, typically in AI, PDF, or CDR format. A vector file, unlike a JPG or PNG, can be scaled to any size without losing clarity. This is essential for creating a sharp image on the final product.
Once the artwork is approved, it is used to create a printing plate, or cliché. The design is chemically etched into the surface of this metal plate, creating a shallow recess of the image. This recess will hold the ink during the printing cycle. The depth of the etching is carefully controlled, as it determines how much ink is transferred.
Step 2: Ink Application and Pickup
Next, a specialized ink formulated for adhesion to stainless steel is flooded over the etched plate. A doctor blade then sweeps across the plate, removing all excess ink from the surface and leaving ink only within the etched design.
This is where the "pad" comes in. A smooth, flexible silicone pad is pressed down onto the plate. The properties of the silicone cause the ink to lift out of the etching and adhere to the pad, which now carries a perfect, mirror-image of your logo. The shape and hardness of the pad are selected based on the specific cutlery handle it will be printing on.
Step 3: Transfer to the Cutlery
The ink-coated pad is then moved over to the piece of cutlery, which is held securely in a custom-made fixture or jig. This fixture is crucial for mass production, as it ensures every single fork, knife, or spoon is held in the exact same position for printing. Without a precise jig, the logo position would vary from piece to piece, leading to inconsistent quality.
The pad presses down onto the cutlery handle. Its flexibility allows it to conform perfectly to the surface, whether it's flat, curved, or slightly irregular. As the pad is compressed, it transfers the ink layer from itself onto the stainless steel, leaving a crisp, clear image.
Step 4: Drying and Curing
Simply applying the ink is not the final step. To ensure the logo is durable and can withstand washing and regular use, the ink must be properly cured. Depending on the ink system used, this may involve air drying for a specific period or passing the cutlery through a heat tunnel. Curing creates a strong chemical bond between the ink and the metal surface, which is critical for long-term adhesion and resistance to scratching or fading.
Why Choose Pad Printing for Your Cutlery Branding?
With several customization options available, why is pad printing so often the right choice? While methods like laser engraving and stamping have their place, they can't match the specific advantages that pad printing offers for branding.
The decision often comes down to your brand's specific needs, particularly regarding color and surface complexity. Pad printing for stainless steel cutlery is the go-to method when a colored logo is essential or when the handle design is not perfectly flat.
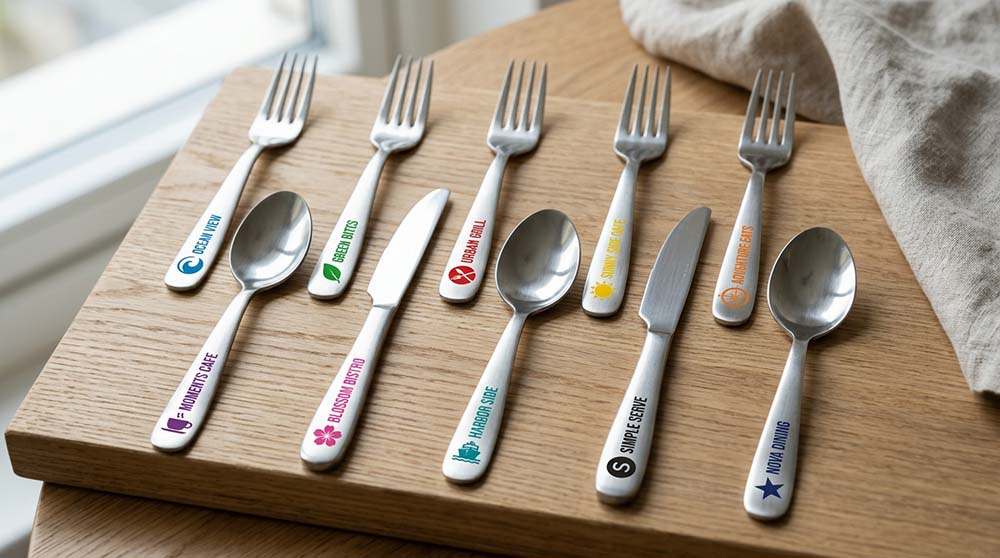
Let's break down the unique benefits and compare it to other common customization techniques.
It Enables Colored Logos
This is perhaps the most significant advantage of pad printing. While laser engraving is excellent for a subtle, high-end metallic mark, it doesn't offer color. Pad printing allows you to reproduce your brand logo in its intended colors.
- Brand Consistency: If your brand identity relies on a specific shade of red, blue, or even gold, pad printing can match that color.
- High Contrast: A black or white logo on a mirror-finish stainless steel handle creates a bold, highly visible statement that is perfect for restaurant or hotel branding.
- Creative Designs: It opens the door to multi-color designs or small decorative patterns that add a unique touch to a private label collection.
For any business where color is a key part of the brand, pad printing is often the only viable option for cutlery.
HIt Adapts to Curved and Irregular Surfaces
As I mentioned earlier, very few cutlery handles are perfectly flat. Most have a slight curvature, beveled edges, or other subtle contours. This is where the flexible silicone pad truly shines.
- No Distortion: Unlike a rigid printing method, the soft pad wraps around the surface, transferring the logo without distorting its shape.
- Complete Coverage: It ensures the entire logo, including the edges, makes full contact with the product, preventing missing parts or faded areas.
I've seen many projects where a direct printing attempt failed because the handle's subtle curve was not accounted for. Pad printing solves this problem elegantly.
Pad Printing vs. Other Customization Methods
To make the best choice, it's helpful to see how these methods stack up.
| Feature | Pad Printing | Laser Engraving | Stamping / Embossing |
|---|---|---|---|
| Color | Yes, multiple colors possible | No, creates a mark by altering the metal surface | No, creates a physical impression |
| Surface | Excellent for flat and curved surfaces | Best on flat surfaces, can adapt to some curves | Requires a die; done during metal forming |
| Texture | Adds a thin ink layer | Creates a subtle texture (etched feel) | Creates a raised (embossed) or recessed (debossed) logo |
| Best For | Colored brand logos, detailed graphics | Subtle branding, serial numbers, text | Tactile logos built into the product design |
| Feel | Smooth surface | Slightly textured mark | Physical 3D texture |
In summary, you should choose:
- Pad Printing when you need color and brand accuracy on various surfaces.
- Laser Engraving for a durable, high-end monochromatic look.
- Stamping/Embossing when you want the logo to be a physical, textural part of the cutlery itself.
What Factors Affect Pad Printing Quality on Stainless Steel Cutlery?
Have you ever wondered why the same logo can look sharp on one sample and blurry on another? Achieving consistent, high-quality results with pad printing involves controlling many variables beyond just the machine itself.
The final appearance and durability of a pad-printed logo are a result of the entire system working in harmony. A small issue in one area, like surface preparation or ink viscosity, can impact the final quality, especially across a run of 50,000 pieces.
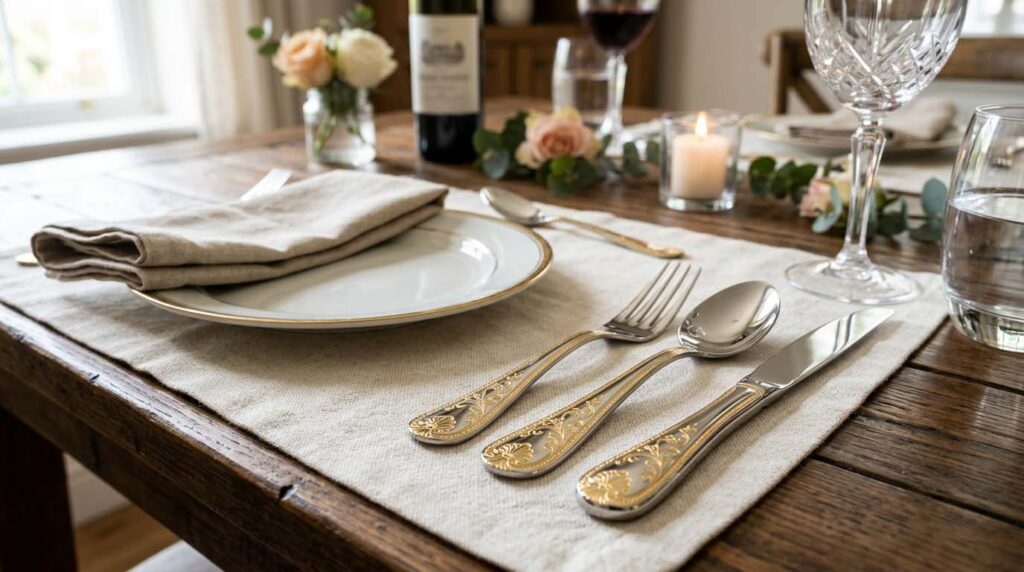
Based on over 20 years of manufacturing experience, here are the critical factors that determine the success of a pad printing for stainless steel cutlery project.
The Impact of Cutlery Surface Finish
The finish of the stainless steel has a major influence on both the look and the adhesion of the printed logo.
- Mirror Finish: A highly polished, smooth surface provides excellent contrast and a clean look for the logo. However, it is unforgiving. The surface must be perfectly clean, free from oils, polishing compounds, or fingerprints, as any residue will prevent the ink from adhering properly.
- Matte/Brushed Finish: The fine texture of a matte finish can provide a better "tooth" for the ink to grip, potentially improving adhesion. However, the ink must have sufficient coverage to fill the texture without losing the sharpness of the logo's edges.
- PVD Coated Finish: Printing on PVD (Physical Vapor Deposition) coated cutlery in gold, black, or rose gold is more complex. The surface energy of a PVD layer is different from raw stainless steel. It is never safe to assume that an ink that works on steel will work on a PVD coating. We always conduct adhesion tests on the specific PVD finish to guarantee durability.
Common Quality Control Issues
In mass production, consistency is key. We actively inspect for several common issues to ensure every piece matches the approved sample:
- Blurred or Fuzzy Logo: The edges of the logo are not crisp. This can be caused by incorrect pad pressure, a worn-out pad, or improper ink viscosity.
- Missing Details: Parts of the logo are not transferred. This often happens on curved surfaces if the pad is too hard or if the pressure is insufficient to make full contact.
- Position Deviation: The logo is not in the correct location. This points to a problem with the product fixture and is why a stable, custom jig is non-negotiable for large orders.
- Poor Adhesion: The logo looks great initially but peels, scratches, or fades after washing. This is a critical failure, usually related to incorrect ink choice, improper surface prep, or incomplete curing. We always recommend wash testing for commercial-use projects.
- Color Variation: The color of the logo is inconsistent across the batch. This requires strict control over the ink mixing process and regular checks against the approved color standard (e.g., a Pantone number1).
How Do You Ensure a Successful Bulk Order of Pad-Printed Cutlery?
Planning a large order of custom-branded cutlery? The key to success isn't just sending a logo file; it's a collaborative process of detailed confirmation and sample approval before mass production begins.
The biggest risks in OEM/ODM projects arise from assumptions. Assuming a logo will fit, assuming a color will look right, or assuming durability without testing can lead to costly mistakes. A structured procurement process eliminates these risks.
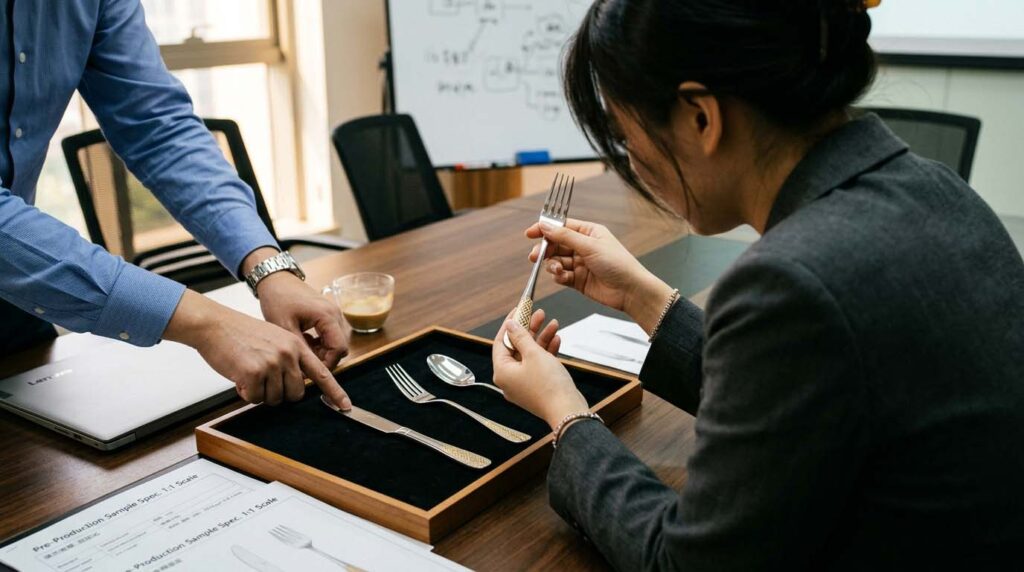
Here’s a practical guide for buyers to navigate the process and ensure the final delivery of 50,000 sets is exactly what you envisioned.
A Real-World Procurement Scenario
Let's imagine a private label brand in the US wants to launch a 24-piece cutlery set with their black logo pad-printed on the handle. They plan to order 30,000 sets.
They send us an email with a JPG of their logo and a picture of a similar product. From a manufacturing perspective, this is just the starting point. To move forward, we need to clarify several details:
- Artwork: We need the logo in a vector format.
- Size & Position: We need the exact dimensions of the logo and its precise location on the handle (e.g., "10mm from the bottom edge, centered").
- Color: "Black" can have many shades. We need to confirm the exact black or provide a sample for approval.
- The Product: We need to analyze the handle's curvature and finish to select the right pad and ink.
Our first step is to produce a physical pre-production sample. The client might review it and say, "The logo needs to be 2mm smaller," or "Let's move it slightly higher." Making this change on a single sample is easy. Making it after 30,000 sets have been printed is a disaster.
My advice is always the same: do not approve mass production based on a digital mockup. Always demand and approve a physical sample of the final product. The way a logo looks on a flat screen is completely different from how it appears on a three-dimensional, reflective, curved metal object.
Buyer's Pre-Production Checklist
Before signing off on a large order of pad printing for stainless steel cutlery, make sure you have confirmed the following with your manufacturer:
- Product Specifications: Cutlery model, stainless steel grade (e.g., 18/10), and surface finish (e.g., mirror polish).
- Final Artwork: The approved vector file of the logo.
- Logo Size: Confirmed in millimeters.
- Logo Position: Confirmed with precise placement instructions.
- Printing Color(s): Confirmed with a Pantone code or an approved color sample.
- Durability Requirements: Discuss the intended use (e.g., hospitality vs. retail) to ensure the right ink and curing process is used.
- Physical Sample: You have received and approved a pre-production sample that meets all your specifications.
- Packaging: How the custom cutlery will be packaged to protect the printed logo during shipping.
This checklist helps ensure that both you and the manufacturer share the exact same vision for the final product.
Frequently Asked Questions
How durable is a pad-printed logo on cutlery?
The durability of pad printing for stainless steel cutlery depends heavily on the ink system, surface preparation, and curing process. For high-use environments like hotels and restaurants, specialized inks and heat curing are used to create a strong bond that can withstand commercial dishwashing. However, it should be considered a semi-permanent branding method, not an eternal one.
Can you pad print on any type of cutlery finish?
Pad printing works on most finishes, including mirror, matte/brushed, and PVD coatings. However, each surface requires a different approach. A smooth mirror finish needs to be impeccably clean, while a textured matte or PVD surface may require specific ink formulations and adhesion tests to ensure a durable bond. It's crucial to test on the actual finish.
What is the main difference between pad printing and laser engraving?
The main difference is color. Pad printing uses ink to apply colored logos or graphics, making it ideal for brand-specific designs. Laser engraving uses a laser to alter the metal's surface, creating a permanent, tone-on-tone mark. Laser engraving is often preferred for a more subtle, premium feel, while pad printing is chosen for its visual impact and branding accuracy.
What file format is best for a pad printing logo?
A vector file format is essential for high-quality pad printing. Files like Adobe Illustrator (.ai), .eps, or high-quality .pdf are ideal. Unlike pixel-based files (like .jpg or .png), vector files can be scaled to any size without losing sharpness, ensuring your logo is crisp and clear on the final product.
Conclusion
Ultimately, pad printing for stainless steel cutlery is far more than a simple printing technique; it is a powerful tool for brand customization. Its unique ability to apply crisp, colored logos to the curved surfaces of flatware makes it an invaluable process for hotels, restaurants, private label brands, and wholesalers looking to differentiate their products. The success of a project, however, is not determined by the machine alone. It relies on a holistic understanding of product surfaces, ink systems, fixtures, printing parameters, and rigorous quality control.
For any business considering a bulk order, the most important takeaway is to treat logo customization as an integral part of product development. My strongest recommendation is to always move from a digital concept to a physical sample. Confirming the logo's look and feel on an actual piece of cutlery before committing to tens of thousands of units is the single most effective way to ensure the final shipment meets your brand's standards for excellence.
If you are looking to create a custom-branded cutlery line, our team has the experience to guide you through every step of the process. Contact us today to discuss your project and how we can bring your vision to life.
-
The Pantone Matching System (PMS) is a proprietary color space used in a variety of industries, primarily printing, to standardize color reproduction. Each color is identified by a unique number, allowing designers and printers to reference a consistent color regardless of the equipment used to produce it. ↩